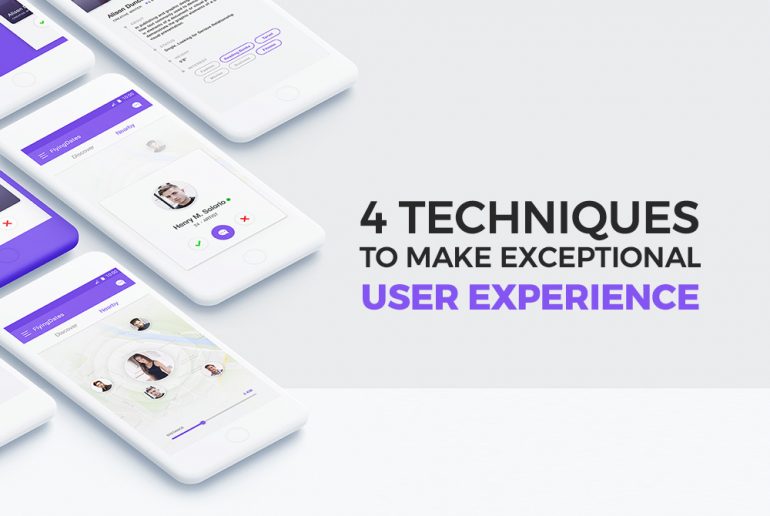
4 techniques to make exceptional User Experience

It just takes a few seconds for a customer to decide whether the site is worth their time or not. Those few seconds are your only chance to reel a potential customer in.

Now, what can be done to attract the user in such a short span of time?

The answer is a great User Experience.

User experience aka UX is considered to be the manner by which a man interacts with a digital product. The emotions or a connection a user experiences while using any service or product. It can prove to be a differentiator in a crowded marketplace or can be a selling point for B2B digital services.

Though, at the core, UX is about contemplating the user preference. Various elements like usability, accessibility, execution, design etc, all come under the umbrella of UX, usability being the key component.

Various industries like Finance, Healthcare, Education, e-commerce are creating user experiences keeping in mind the needs of the users, focusing on making the product more desirable.

It is essential that the users have the same feeling about them regardless of the device. To create a more universal, and effective, user experience.

Let’s take a look at what good UX Design asks for and avoid confusing surprises.

Letting simplicity rule

All roads lead to a simplistic and human-centric approach of design, where the site has to be well-organized keeping the user in the prime focus.

For an example say retail sites can be fairly complex. The main aim of these sites should be to enhance the usability of the web space which will motivate the user to take the next step towards the desired action.

Amazon has perfectly achieved this by using the same UX for years now, letting the simplicity rule.

We can take inspiration from Paypal as well. After receiving feedbacks stating their site was too complex, it was upgraded in 2014. John Maeda’s Laws of Simplicity was are at play here: reducing, organizing, adding meaning, positioning.

Tearing down roadblocks

Fluidity is an essential component of a great User Experience. It helps the user in easily navigating through the site. Various roadblocks which occur may not create a rich human interaction experience and will result in a sloppy site which may not drive users back.
Roadblocks can be vaporized by developing a design which makes the user reach their goal faster and smoothly. Each extra step adds friction which can cause users to drop out of the process.

Humanizing technology

Humanizing technology is a huge part of the user experience. Developing content which creates an emotional bond with the user is making the website move beyond usable and useful. The users can be delighted by using elements of humour. One of the most promising new element that can make interfaces easier and more fulfilling is Chat-bots. By starting a conversation on the site can result in achieving a human touch.

Adding Clarity and Digestibility

Great designs are anything but difficult to process. A simple website will make sure the user is not using a ton of energy to make sense of what he/she is looking at. Going beyond an easy-to-read copy using different sizes, colours, icons can highlight and allows someone to find what they are looking for a lot faster.
Rather than hitting a brand-new user with a whole stack of instructions, a digestible design will have a simplified outline.
Android Studio TIPS for Devs.

If you have decided to bounce into Android advancement or have been filling in as an Android developer for some time now, you have reached the ideal place.There is no alternate route or a simple method to become a successful developer. However, if you will invest the exertion and heart required, you will unquestionably get all that you deserve.
On your mission of becoming an Android developer and for increasing your chances of success as an Android developer we have prepared a few tips. There are some paramount things one should always take care of if you aspire to achieve great skills.

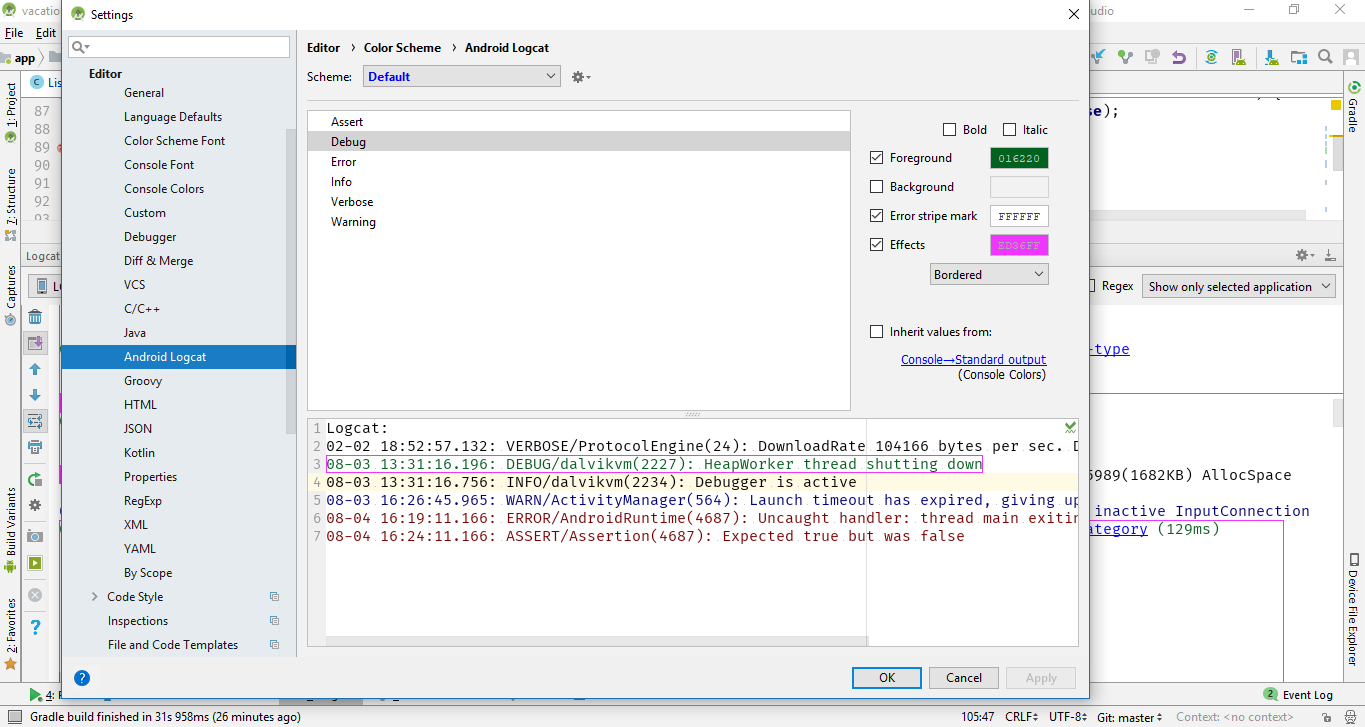
1. Change Android Logcat colors.
To change Android Studio Logcat you need to go to: Preferences (Settings on Windows / Linux machines) → Editor → Colors & Fonts → Android Logcat and change the foreground color for every type of log.

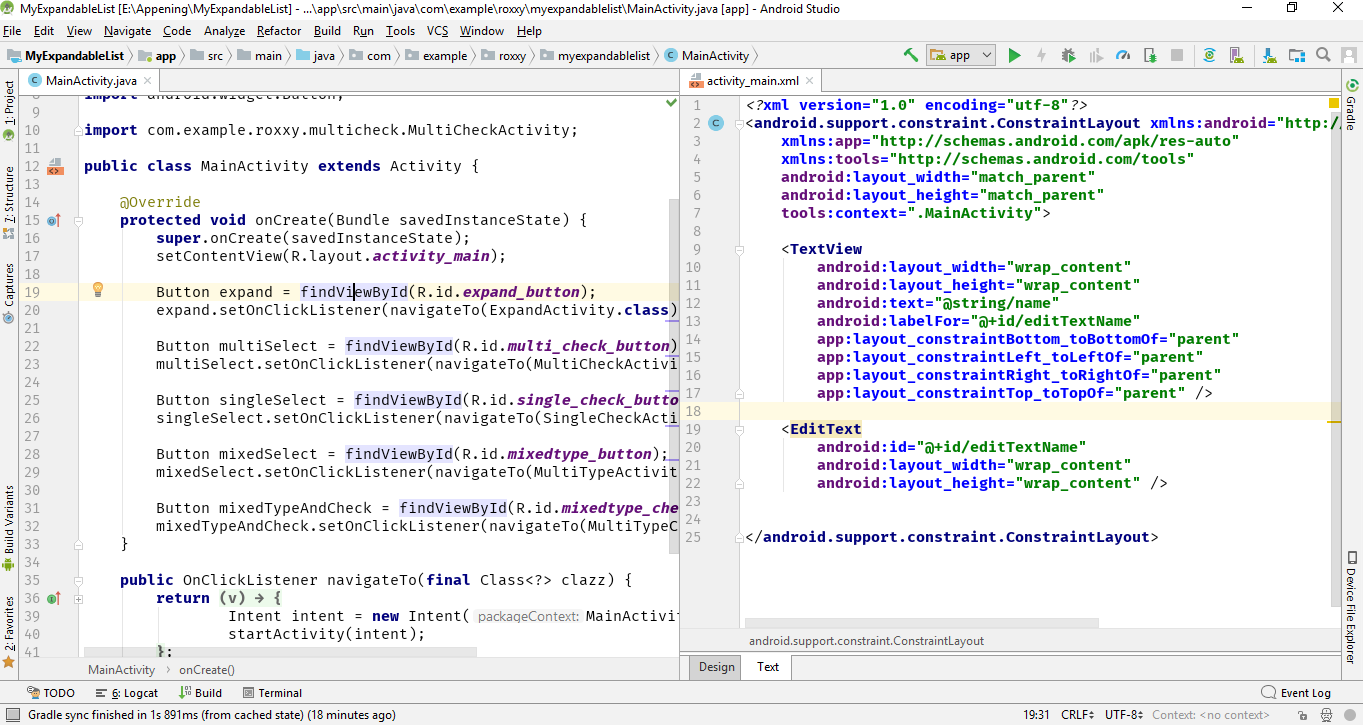
2. Use split screen for increasing efficiency.
To open split screen :Right Click on tab you wanted to split → Vertical / Horizontal Split →and that’s it.

3. Enable multi cursor feature
To Enable multi Cursor :Press (alt + j for windows) or (ctrl + g for mac) →select the word with multiple occurance you want to rename and start typing .

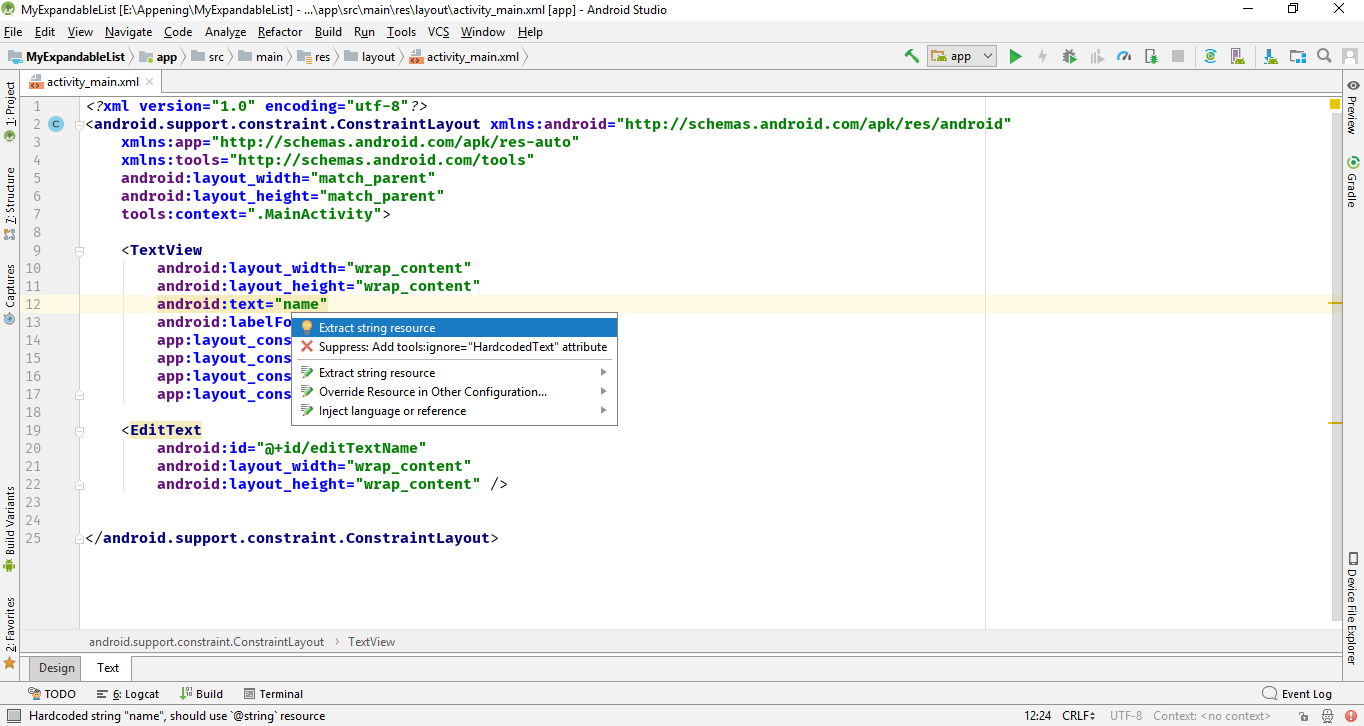
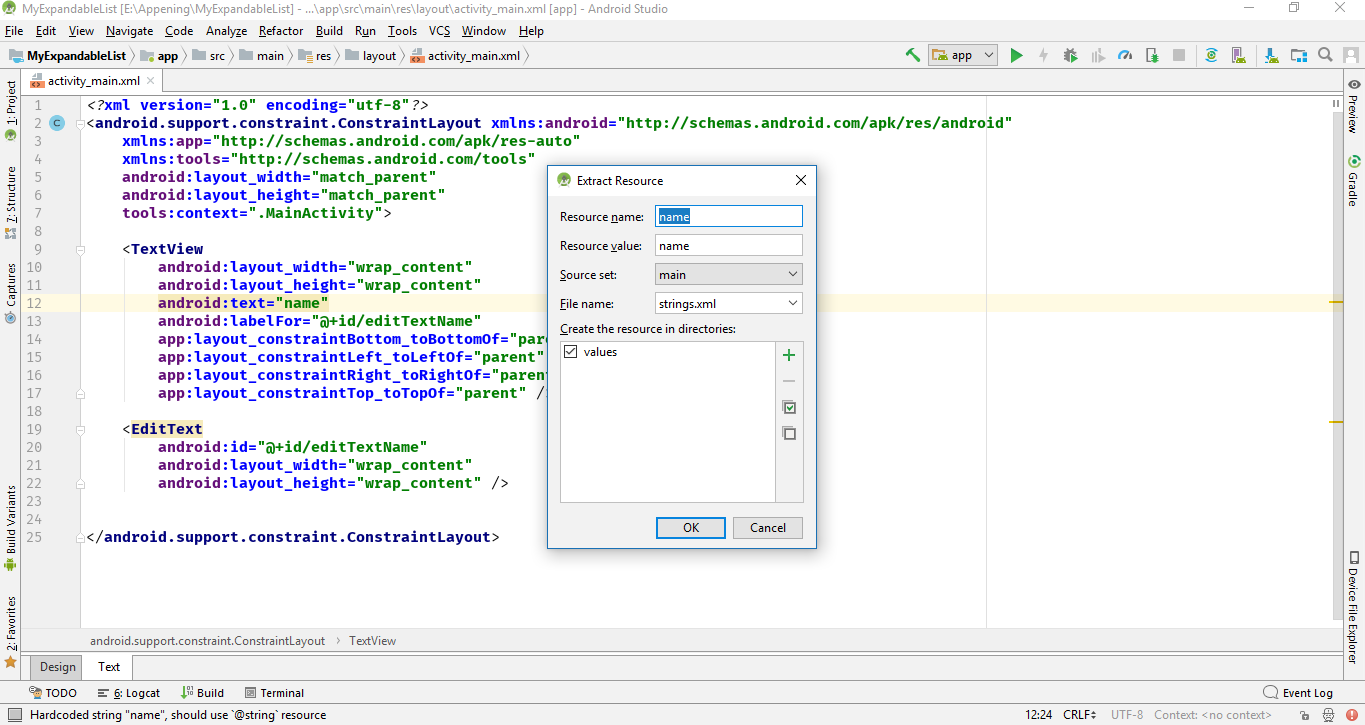
4. Move hardcoded strings to resources
Step : 1 Press option + return (Windows / Linux: alt + enter).

Step : 2  Enter name of string in Resource Name hit OK...and you are done.

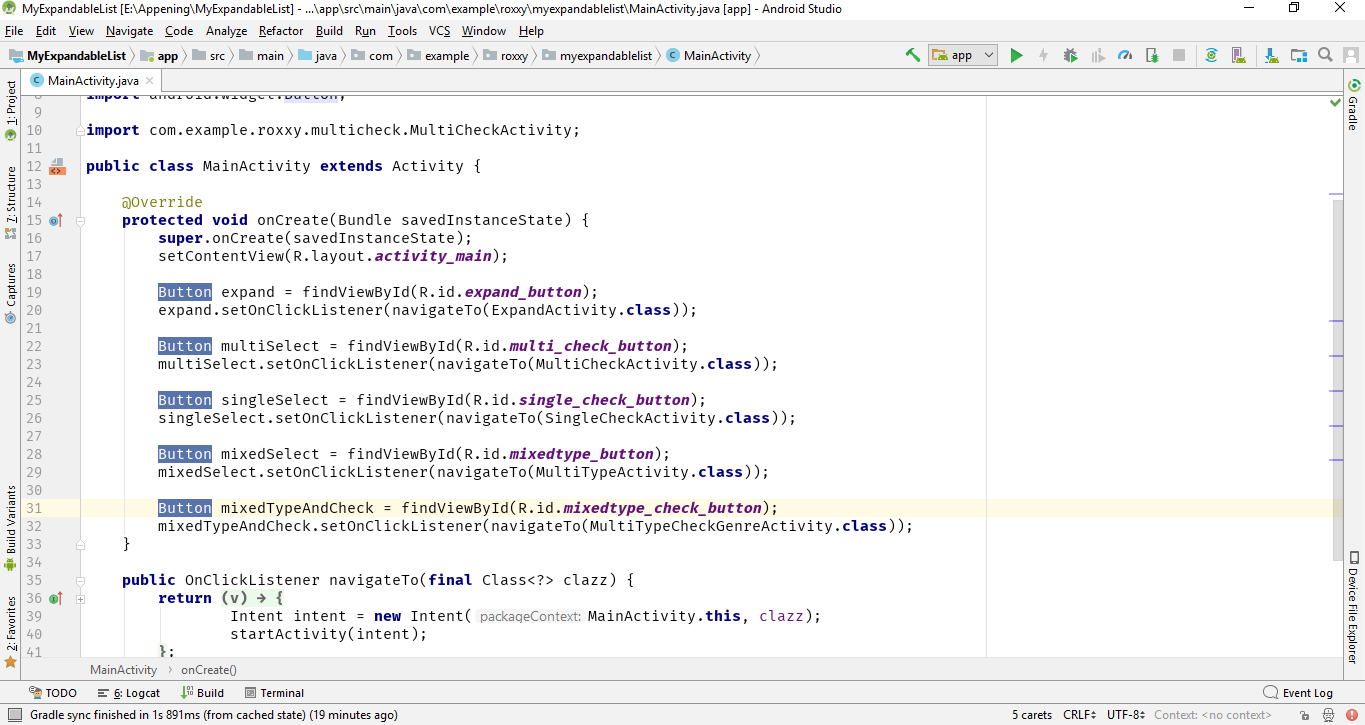
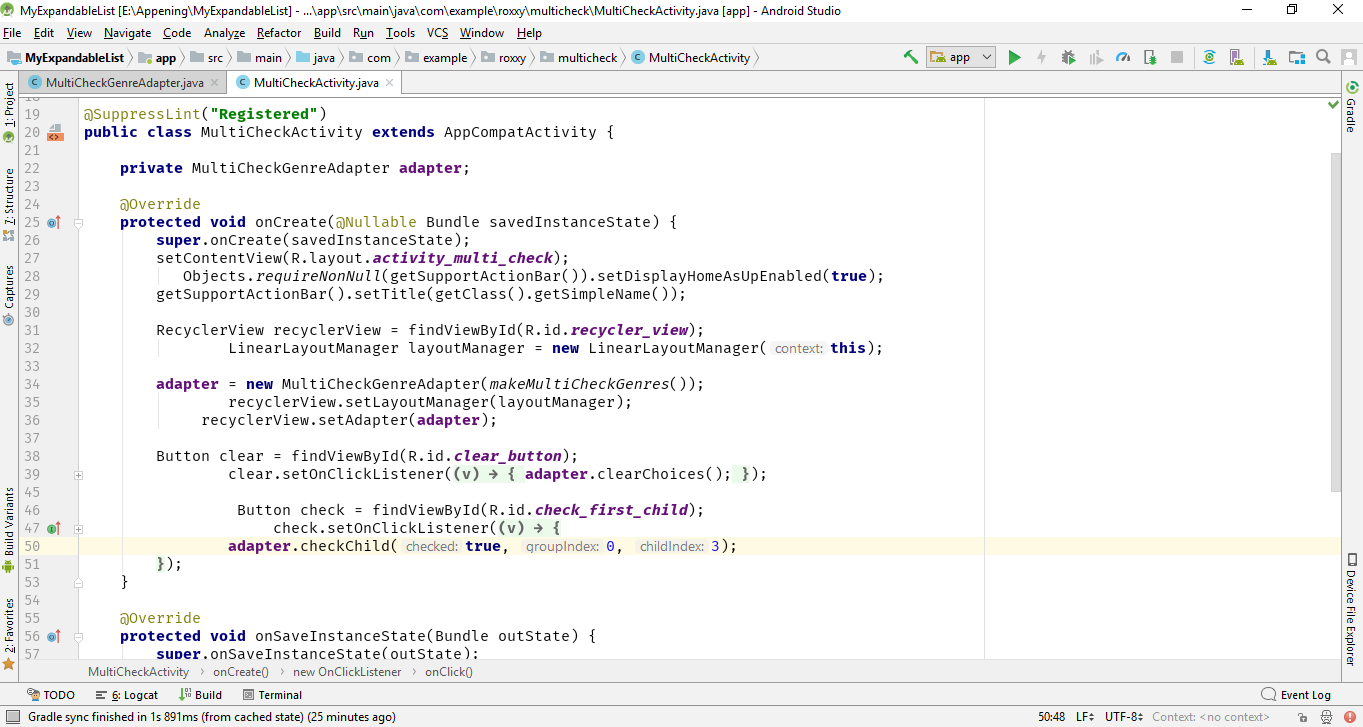
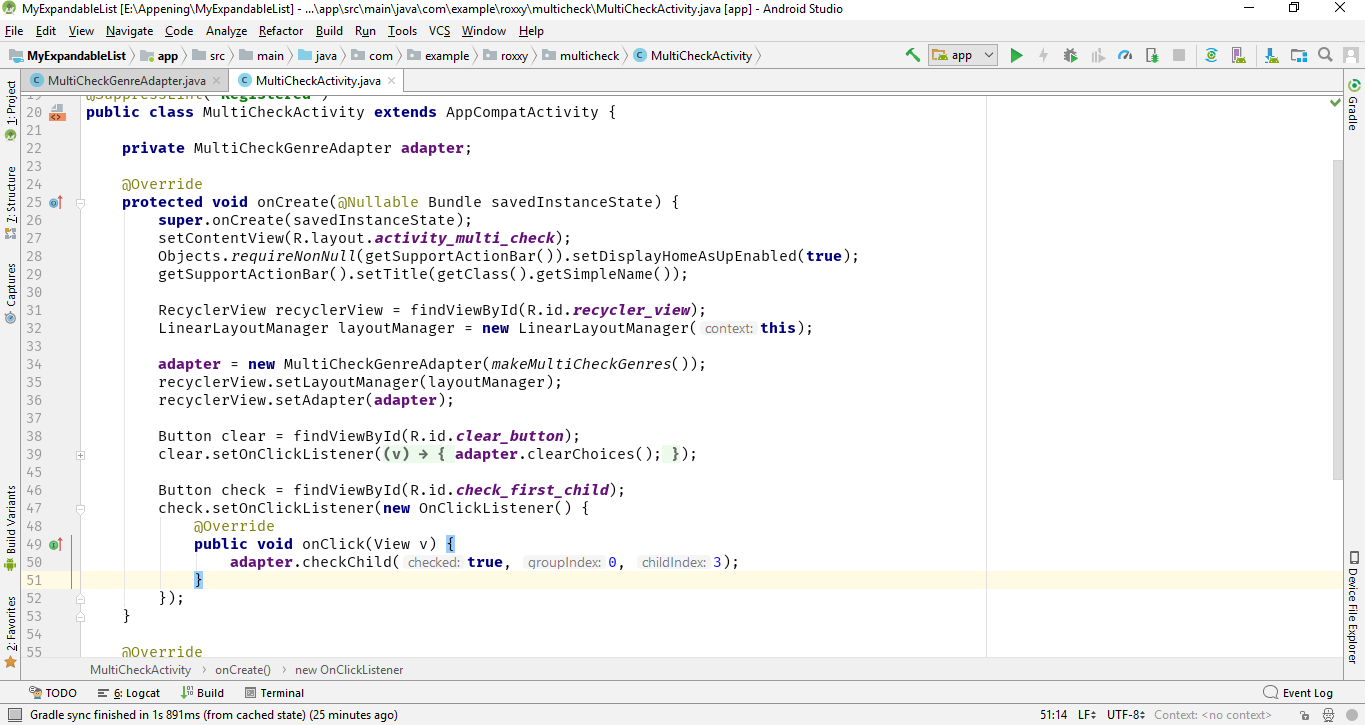
5. Format Your Code
 Quickly Hit cmd + option + l (Windows / Linux: ctrl + alt + l) to format your code , it works like a charm for messed up programmers, gives proper indentation, and spaces wherever needed.

Before Formatting

After Formatting

6. Quickly close a tab
While holding Shift key and click on the opened tabs to close them to quickly close the unusable tab.

Conclusion
Making progress as another Android App designer isn’t simple, yet isn’t inconceivable either. What’s more, with all the true stories of overcoming adversity that are out there, what influences you to surmise that you can’t be one of them.
Last but not the least- Think Big. As Palomar stated: “You need to think your app will be downloaded by millions users” Except if you target a small group and you know about what that implies for your business, you should plan for an impressive future and have faith in progress.

Happy Coding


How to integrate Maven Project from Bitbucket to Continuous Integration Jenkins

First, let’s understand what Continuous integration is. It’s a process which allows you to identify errors in the starting. All development work is integrated as early as possible and artifacts are created and tested automatically.

Now, what is Bitbucket?

Bitbucket is the most commonly used tool for version control system, the whole team can add and commit the test scripts that are developed locally and push the changes to the bit.

How is Jenkins used?

Jenkins is a widely used open source tool to perform continuous integration and build automation. It monitors the execution of the steps and allows to stop the process if one of the steps fails.

Jenkins can pull the source code from Bitbucket server by selecting the option of source code management and specify the SSH key and can find the source code of your project.

Now we will take you through the process step by step.

  1. To setup Jenkins, first of all, you have to download Jenkins.war file from the link- https://jenkins.io and copy that file to your c drive.
  2. Open a command prompt and execute —
    1. java –jar c:/ jenkins.war
  3. When the installation is complete the browser will be launched. If it doesn’t, open a browser- To browse http://localhost:8080
  4. To unlock Jenkins page, paste this password into the Administrator password field and click Continue.
  5. When Jenkins is up and running you can click on Manage Jenkins.
  6. After that click on Manage Plugins.
  7. Move to Available tab
  8. Search for Maven Integration plugin and Bit Integration by clicking on the checkbox.
    Maven Integration plugin will allow you to add a maven project and Bit Integration plugin will allow you to pull source code from the repository.
  9. Then click install without start and wait for the installation, then click on restart.
  10. Comeback to Manage Jenkins page.
  11. Click on Global Tool Configuration.
  12. Click on JDK Installations.
  13. Now add the JDK path.
  14. Click on Add Git and add the Git path.
  15. Click on Maven installations and add the Maven path.
  16. Click on save. The configuration is done. Now you just need to create a Maven project.
  17. To create a new Project, you have to Move to Jenkins dashboard and click on Create New Job.
  18. Just provide any Name for Project and select Maven Project for creating a maven project and then click on Ok.
  19. Select Git in Source Code Management and enter your repository clone SSH/HTTPS URL and add a valid username and password in credentials.
  20. Scroll Down to Build under this in Goal and Options. Enter clean install or as you need.
  21. Click on Save.
  22. Now you can click on Build and whenever you click on build, Jenkins will pull the latest commit source code from Bitbucket and generating a build. Also, it will generate a test report of that execution.Hope you got some insight on how to  integrate Maven Project from Bitbucket to Continues integration Jenkins and found our tips useful. Suggestions are always welcome and appreciated.